


Drawing a rose is a captivating exercise for artists, whether you’re a beginner or an experienced professional. Roses, with their intricate petals and delicate structure, offer an excellent opportunity to practice precision, shading, and attention to detail. In this guide, we will explore step-by-step instructions for creating a stunning rose drawing, covering everything from initial sketches to advanced shading techniques.
The Anatomy of a Rose
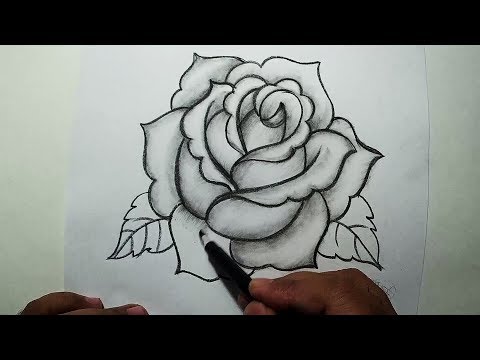
Before we begin drawing, it is essential to understand the anatomy of a rose. The flower consists of layers of petals spiraling outwards from a central core. Observing the natural structure will help you achieve more realistic results in your drawing. The petals fold, curve, and overlap each other in an organized yet seemingly chaotic fashion, and capturing this detail is key to creating a lifelike depiction.
Key Features to Observe:
- Petals: Soft and rounded, varying in size as they move outward.
- Stem: Often slender, with subtle curves that lend elegance to the overall appearance.
- Leaves: Usually serrated edges and defined veins.
- Thorns: Small yet sharp, adding realism to the composition.
Materials You’ll Need
While any drawing can be done with basic tools, having the right materials will significantly enhance the quality of your rose drawing. Here’s a recommended list of materials:
- Pencil set (2H, HB, 2B, 4B, 6B)
- Eraser (kneaded and regular)
- Blending stump for smooth shading
- Sketchbook or drawing paper
- Fine-tip pen or ink (optional for outlining)
Step-by-Step Rose Drawing Tutorial
Step 1: Start with the Basic Shape
Begin by lightly sketching the outline of the rose using an HB pencil. Draw a small oval in the center, which will serve as the core of the rose. From this core, sketch a series of rough, concentric shapes that gradually spiral outward. These initial shapes don’t need to be perfect; they are merely a guide for where your petals will go.
Step 2: Draw the Inner Petals
From the center, start sketching the first layer of petals. Pay attention to how they overlap slightly, curling inward toward the core. Use curved lines to convey the folds of the petals, and vary their size for a more natural look.
Step 3: Build the Outer Petals
As you work outward, the petals will become larger and less tightly curled. Draw these with more prominent curves and softer edges. Rose petals near the outside of the flower are often looser, spreading out gracefully.
Step 4: Add the Stem and Leaves
After you’ve finished outlining the petals, it’s time to sketch the stem. Draw a smooth, slightly curved line extending down from the base of the flower. Add a few leaves on either side of the stem. Remember, the leaves are usually broad with serrated edges and noticeable veins running through them.
Step 5: Erase Unnecessary Lines
Once you are satisfied with the shape of your rose, lightly erase any unnecessary construction lines. This will clean up your drawing and allow you to focus on the finer details.
Mastering Shading Techniques for Realism
Shading is the element that will bring your rose drawing to life. The play of light and shadow on the petals will give them a three-dimensional appearance. Follow these steps to achieve a realistic look:
Step 1: Light Source
Before you begin shading, determine the direction of your light source. This is crucial for establishing the placement of shadows. For example, if your light source is coming from the top left, the right side of the petals will be in shadow.
Step 2: Layer Your Shading
Using a 2B pencil, lightly shade the areas of the petals that fall into shadow. Use small, controlled strokes to follow the contour of each petal. Gradually build up the darkness by layering strokes, switching to a 4B or 6B pencil for the deepest shadows near the core of the rose.
Step 3: Blend for Smoothness
For softer shadows and a more polished look, use a blending stump or a piece of tissue to gently smudge the pencil marks. This technique helps to create a more seamless transition between light and shadow, enhancing the realism of your rose.
Step 4: Highlight the Edges
To make the rose pop, leave the edges of the petals lighter, or use an eraser to lift some of the graphite. This contrast between light and dark will add depth and make the petals appear more three-dimensional.
Adding Fine Details
Once the shading is complete, you can add finer details to your rose. These can include:
- Veins on the petals: Lightly sketch small, subtle lines on some petals to mimic the natural texture.
- Thorns on the stem: Add tiny pointed shapes along the stem for a realistic touch.
- Leaf texture: Draw the veins and serrated edges of the leaves to make them appear more lifelike.
For an extra touch of contrast, you can go over some parts of your drawing with ink or a fine-tip pen. Outlining certain areas, such as the edges of the petals or the veins in the leaves, will add definition to your drawing.
Rose Drawing Variations
There are many ways to experiment with rose drawing once you have mastered the basic techniques. Here are some ideas to take your drawing to the next level:
Abstract Rose
For a more modern and artistic look, try creating an abstract rose. Focus less on realism and more on exaggerated shapes and bold lines. Use minimal shading and sharp edges to give the rose a graphic, stylized appearance.
Realistic Rose with Color
Once you’re comfortable with pencil shading, consider using colored pencils or watercolors to add vibrant hues to your rose. Begin with a light base layer of color, and gradually build up intensity by layering different shades of red, pink, or even white for a unique twist.
Bouquet of Roses
Challenge yourself by drawing an entire bouquet of roses. This composition will require careful attention to how the flowers overlap and interact with one another. Vary the sizes and angles of each rose to create a dynamic and balanced composition.
Common Mistakes to Avoid When Drawing a Rose
Even experienced artists can make mistakes when drawing roses. Here are some common pitfalls and how to avoid them:
- Over-shading: Too much shading can make the petals look flat and muddy. Be subtle and build up layers gradually.
- Uniform petals: In real life, petals vary in size and shape. Avoid drawing petals that all look the same.
- Neglecting the leaves and stem: These are essential parts of the rose’s structure, so don’t rush through them.
Drawing a rose is an incredibly rewarding artistic endeavor that challenges your skills in observation, precision, and shading. Whether you aim for a simple sketch or a highly detailed rendering, mastering the art of rose drawing opens the door to a wide range of creative possibilities. With practice and patience, your drawings will capture the elegance and beauty of this timeless flower.